Monday, October 27, 2008

Holiday Recipe #1: Mummy Dogs

Occasionally, I try to make the holidays a little bit more fun for my children by using some holiday recipes. Just thought I'd post some of my favorites here, in case any of you want to try them out!

Today all of my children stayed home from school because we are all sick. So, since my girls were eating lunch with us, I decided to make one of our favorite Halloween lunches: Mummy Dogs.

So simple, and so entertaining.

What you need:

1 can crescent rolls
8 hot dogs
pizza cutter
mustard & ketchup

How to do it:

Press the crescent seams together to form two long rectangles. Using a pizza cutter, cut each of the rectangles into four strips, cutting from one short side to the other (the length of the rectangle). Take a hot dog and starting on one end of a dough strip, roll the hot dog in the dough making sure to not overlap the dough (except at the bottom, which you'll pinch together to seal the end of the mummy). Bake at 350° for 15-18 minutes. Using a toothpick, make dots for eyes out of mustard or ketchup.

Thursday, October 16, 2008

My Boschy Adventures: Chocolate Chip Pumpkin Muffins

Okay, so I've been using my Boschy to make a lot of stuff. The most I've done is wheat bread ... I'm determined to find a good wheat bread recipe. But, I've also made white bread, rolls, pretzels (twice), and most recently Chocolate Chip Pumpkin Bread (Muffins).

I posted this recipe on my old blog, but I haven't been able to import all my old recipes here. So, I'm posting it again! I LOVE these muffins! I like to make them as mini muffins because they are perfect size for a snack (and less messy than cutting the bread). This recipe makes almost 100 mini muffins, about 50 regular-sized muffins, 8 mini bread loaves, or 3 regular-sized bread loaves. You'll have to adjust the baking time according to which pan you use. I don't usually make this recipe into regular-sized muffins, but I will tell you that I bake the mini muffins for 18 minutes each batch (I only have one 24-cup pan), and the mini loaves for about 45 minutes. Just about every time a friend of mine watches my children for me, I take a bag of these muffins for a snack (and a thank you). And, I don't think I've ever had a friend not ask for the recipe. So, I thought I'd spare all of you the chore of watching my children and just give you the recipe!

CHOCOLATE CHIP PUMPKIN BREAD

3 cups sugar
1 (15-oz.) can pumpkin puree
1 cup veggie oil
2/3 cup water
4 eggs
3 1/2 cups flour
1 Tbsp. cinnamon
1 Tbsp. nutmeg
2 tsp. baking soda
1 1/2 tsp. salt
1 cup semi-sweet chocolate chips
1/2 cup chopped walnuts, optional

Preheat oven to 350°. Grease and flour three 1 lb. size coffee cans, or three 9x5-inch loaf pans. In a large bowl combine sugar, pumpkin, oil, water and eggs. Beat until smooth. Blend in dry ingredients, Fold in chips and nuts. Pour into cans/pans. Bake for 1 hour, or until an inserted knife comes out clean. Cool on wire racks before removing from cans/pans. (I actually immediately dump mine out and let them cool on the rack when I make mini muffins because I need the pan again.)

Tuesday, October 14, 2008

Zuppa Toscana Soup

Our family went to a friend's soup pot luck on Saturday night. I wasn't in the mood to make any of my regular soup recipes. That's usually how I work ... either I get a recipe suggested from a friend, or I try out a new recipe on a bunch of people (just in case we don't like it so we won't have to keep a ton of leftovers in the fridge that we won't end up eating).

Anyway, for some reason I thought it would be interesting to see if I could find a recipe to replicate the Zuppa Toscana soup served at Olive Garden. So, I tried this recipe; and it turned out pretty similar and very yummy. (In fact, one of the guys there asked if I was trying to win a prize [we'd just won "most original chili" at a chili cook-off].) This is definitely worth trying if you like that spicy sausage and potato soup.

Zuppa Toscana

1 lb. ground spicy Italian sausage, crumbled
1/2 lb. smoked bacon (6 slices), chopped
1 qt. water
2 (14.5 oz.) cans chicken broth (about 3 2/3 cups)
2 large russet potatoes, scrubbed clean and sliced 1/4-inch thick
2 garlic cloves, peeled and crushed or minced
1 medium onion, chopped
2 cups chopped kale or swiss chard (I couldn't find either at the grocery store, so I used spinach)
1 cup heavy whipping cream (I added probably about another 1/2 cup)
salt & pepper, to taste

In a skillet over medium-high heat, brown sausage, breaking into small pieces as you fry it; drain, set aside. In the same skillet over medium-high heat, brown bacon; drain, set aside. Place water, broth, potatoes, garlic, and onion in a pot; simmer over medium heat until potatoes are tender. Add sausage and bacon to pot; simmer for 10 minutes. Add kale and cream to pot; season with salt and pepper; heat through.

Tuesday, September 30, 2008

Sweet Mingle Mix

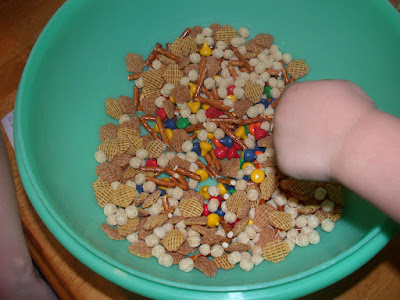
I feel very blessed to be in a school district that fits snack time into the school schedule. The catch is that we have to send our children with their snacks. I always try to have something salty with protein of some form for Una's snack because that combo seems to help her with her hypoglycemia. I would LOVE to send just plain regular chex mix because of the salty nuts and lack of sugar, but she HATES that stuff. In fact, this is the only snack mix I've been able to make (find) that Una will eat and thoroughly enjoy. And, although it is rather sweet, it's not something she'll get everyday. (Thanks, Jessica, for sharing this with me!)

SWEET MINGLE MIX
1 1/2 cups pretzel sticks (broken in half)
2 cups Chex
2 cups Cheerios (not honey-nut)
1 cup peanuts
1 cup M&Ms
10 oz. vanilla candy coating

Line driper pan with wax paper. Combine all ingredients, except candy coating in a large bowl. Melt candy coating in microwave. Pour over dry ingredients. Pour mixture into dripper pan to cool. When cool, break apart. Store in covered container.

So, let's make this together!
I don't use the same ingredients; but, I'm sure you can mix it up according to what your family likes best.
Start off with the pretzels.
Then add the Kix and Crispix.
Now add the Kissables and peanuts (which are not shown).
Don't forget to let the little ones taste it first!
Pour Vanilla Candy Coating over everything. (My microwave died on me, so I had to use my double boiler.
Stir everything until it is well coated. Una and Dos were my helpers.
Maybe they'll grow up to be hand models?
Dump it all out onto wax paper to cool. Then break it apart and store in ziploc baggies. And, if you're like me, you'll place those baggies in the freezer. That way, when you pull them out they can go into lunch boxes and not get all melted and messy (and neither will the hands that dig into the baggies).

Easy Zesty Chicken Pot Pie

This week there are two TTT posts because I skipped out last week. This one is dedicated to a super easy chicken pot pie. Papa LOVES this pot pie for the flavor; I LOVE this pot pie for the simplicity.

ZESTY CHICKEN POT PIE

12 oz (1 1/2 [8 oz.] pkgs.) cream cheese, cubed
1/2 cup chicken broth
3 cups choped cooked chicken
2 pkgs. (10 oz.) frozen mixed veggies, thawed*
1 pkg. Italian salad dressing mix
1 refrigerated ready-to-use pie crust**
Preheat oven to 425°. Place cream cheese in large saucepan. Add broth; cook on low heat until cream cheese is completely melted, stirring frequently with wire whisk. Stir in chicken, veggies & salad dressing mix. Spoon into 9-inch pie plate. Cover wtih pie crust; seal and flute edges. Cut several slits in crust to allow steam to escape. Place pie plate on baking sheet. Bake 20-25 minuets or until golden brown.
Serves: 8

*I use a peas & carrots mixture for the veggies.
**The first time I made this, I used two pie crusts, placing one in the pie dish before pouring in the filling. I actually prefer it this way.

Una and I had fun using my mini cookie cutters (I originally got these to cut out marzipan shapes for a birthday cake) to make a design in the pie crust instead of just cutting slits.

I also skipped reading the part about placing the pie dish on a cookie sheet .... big OOPS! This is a must, unless you want to clean your oven at least three times over the next few days. (That's why my cookie sheet looks so clean ... I realized when I started smelling burned filling that I needed the cookie sheet and slid it under the pie a little bit too late.)

Tuesday, September 16, 2008

Farmhouse Chicken

This week I'm posting one of my absolutely favorite dinners. Luckily for me, my sister was here while I made it, so she took pictures for you. (That's why they are so much better than the pictures I take!) She also said that she prefers step-by-step instructional photos, so that's what she took!

Originally I got this recipe from the Kraft Food & Family magazine a couple of years ago. Since then, I've altered it to my liking. (Actually, the original is much more health conscience: using things that say "reduced-fat," "light," "fat-free," and "reduced sodium." We're all about getting extra fat in our house [and flavor], so I just steer clear of such statements. But, to each their own; make it the way you want to make it!) So, I'll post the original recipe at the bottom in case you want that. Otherwise, this is the way I make it:

Start by heating about 1/3 cup Italian Salad Dressing in a skillet. Use more or less depending on how many chicken breasts you are using. I needed 6, so I used 1/3 cup dressing. Add your thawed chicken breasts to the heated dressing.


While your chicken in browning, start cooking some brown rice. I pour two cups brown rice into a pot, then fill the pot with water until the rice has about 1 to 1 1/2 inches of water above it. Then, I boil the water down until craters form atop the rice. It usually takes a while to get to this point. So, we'll skip to the next thing I do after I start the rice:

Peel and slice diagonally 5-6 carrots. Again, the number varies according to how much you'll need. In my case, we LOVE these carrots, so I think I used 6.

Then, cut one onion into wedges. Put both the carrots and onions in a bowl and set them aside to use once the chicken is done browning.

At this point, the chicken has probably been browning for a few minutes. Turn it over. Let the other side cook until it turns a golden brown.

Add carrots and onions.

Pour in one can chicken broth. (Because I was feeding many people, I actually used 1 1/2 cans chicken broth in my rice instead of water, then I poured the left over 1/2 can of broth in with this one can of broth.)

Cover, and let simmer for 20 minutes; or until carrots are tender.

Check your rice. Do you have craters??? I did. So, I put a cover on my rice and reduced the heat to low. (Ten minutes from this point the rice is ready. This is how I make white rice as well, except the water is only 1-inch above the rice.)

Use this time to cut up one package of cream cheese into cubes. (Again, I used one and half packages because we LOVE the gravy for this dish, and I wanted to be sure to have enough.)

When your timer goes off, or your carrots are tender, remove everything from the broth. Cover it to keep it warm.

Add the cut-up cream cheese to the broth in the skillet. Whisk it together with the broth on high heat until the cream cheese is blended in. Reduce heat to low and let simmer for 3-5 minutes or until it's thickened a little bit.


Pour cooked rice onto a platter.

Place chicken, carrots and onions atop rice.

Pour gravy over everything.

Take a good look at your very aesthetically pleasing dinner. Then, dig in and revel this yummy goodness.

FARMHOUSE CHICKEN DINNER

¼ cup flour
½ tsp. pepper
4 small bone-in chicken breast halves (1 ½ lb.), skin removed; or 4 skinless, boneless breasts
¼ cup light Italian dressing, reduced fat
2 cups Minute Brown Rice, uncooked
2 cups baby carrots
1 medium onion, cut into wedges
1 can (14.5 oz) fat-free reduced sodium chicken broth, divided
4 oz. Neufchatel cheese

Mix flour and pepper in shallow dish. Add chicken; turn to evenly coat both sides. Heat dressing in non-stick skillet and add chicken meat-side down; cook 5-6 minutes or until golden brown. Turn chicken over; add carrots, onions and 1 cup broth. Cover, and reduce heat to medium-low; simmer 20 minutes or until carrots are tender and chicken is cooked through. Meanwhile, prepare rice as directed on package; spoon onto serving platter. Use slotted spoon to remove chicken and veggies from stew; place over rice. Cover to keep warm. Add Neufchatel cheese and remaining broth to skillet; increase heat to high. Cook until cheese is melted and sauce is well blended, stirring constantly. Reduce heat to medium-low; simmer 3-5 minutes or until sauce is slightly thickened, stirring occasionally. Spoon over chicken and veggies; sprinkle with 2 Tbsp. chopped parsley.

Monday, September 15, 2008

Making Bread

Okay, so my sister has been here visiting over the weekend and she decided she wanted to "help" me make bread so she could do it at her house. Little did I know that when she said "help" it really meant "you-make-the-bread-while-I-make-a-mini-movie!"

Anyway, she recorded me making bread and posted it on her blog. I figured that since the video was of me that I'd post the video on my blog too! So, here you go!

Tuesday, September 9, 2008

Ham & Cheddar Loaf

I was looking online for something new to make the other day and came across this recipe. It reminded me so much of Hot Pockets that I just had to try it. I can't wait to try all the variations; although, I think next time I'll make individual sizes. Oh, the recipe says that it has six servings of one slice each; which I thought wasn't enough to feed my family of six for dinner (based on the picture of how big their slices were), so I made two loaves. Totally only needed one, so I froze the other for another day! I also needed to make bread, so I just used my favorite white bread recipe* in place of the frozen bread dough.

HAM & CHEDDAR LOAF

1 lb. frozen bread dough, thawed
1 pkg. (9 oz.) ham slices
1 cup cheddar cheese, shredded
¼ cup Miracle Whip dressing
1 egg, beaten
1 Tbsp. Parmesan cheese, grated

Heat oven to 350°. Flatten dough on lightly floured surface with hands. Roll into 12x8-inch rectangle with rolling pin. (If dough is difficult to roll, cover with plastic wrap and let stand at room temperature for 30 minutes before rolling out.) Top with ham to within ½ inch of edges. Mix cheddar cheese and dressing; spread over ham.

Moisten edges of dough with water. Starting at one of the long sides, fold one-third of dough over filling; repeat with other long side. Pinch seams together to seal. Place seam-side down, on lightly greased baking sheet. Cut three diagonal slits in top of dough with kitchen shears. Brush with egg; sprinkle with Parmesan cheese.

Bake 35-40 minutes or until golden brown. (I baked mine for 35 minutes and it was too brown … I think 30 minutes is sufficient.) Cool 10 minutes before slicing.


*Here’s my favorite white bread recipe (anyone have a whole wheat bread recipe they LOVE?)

This is my favorite because it always turns out perfectly. Seriously, it does. I found it on a recipe card of my mom’s when I was typing up all her recipes (I promise, Mom, you’ll get them back soon). There was written on the card: Works every time. I thought that was a ridiculously arrogant statement, and was determined to prove it wrong. And, I can’t. This is THE PERFECT white bread recipe. I have made it by hand and in a mixer, and both times it has turned out fabulously.

It only takes about an hour and half to make this bread; and there’s very little kneading involved. If you use a mixer, you don’t really need to knead at all; if you make it by hand, you’ll probably have to knead just enough flour into the dough to make it soft and supple instead of sticky (once the dough starts to clean the flour off the counter, stop kneading).

I also love that this recipe is so easy to scale up and down according to how many loaves you want. I don’t like homemade bread that is 4 or more days old, so I usually make only 2 to 3 loaves at a time. But, because of the recipe, I’m able to make even just one loaf if I want, and it’s not hard to figure out the measurements for the ingredients. Seriously, if you’ve never made bread before, but have always wanted to … this is the recipe to get you going. It’s that easy! There weren’t any directions on my mom’s recipe card, so I made up my own and they’ve worked for me so far.

In a large bowl combine all dry ingredients. Warm up your water in the microwave to the right temperature. (I usually test it with my pinky finger. If the water is close to burning my finger, then it’s just about right. Sometimes I check with a thermometer, just to be safe. But, if it feels super-duper hot, don’t pour it into your dry ingredients because you’ll kill the yeast. Also, if you've ever proofed your yeast before, you'll need the water to be hotter than the standard 105°-115° because the yeast is mixed in with the flour already.)

Add water and shortening. Stir together until you have a nice soft dough.

Place dough in a greased large bowl; turn to coat (or just turn, then flip the dough upside down). Cover, and place in a warm spot to rise. (I turn on my oven to 350° and set my bowl atop the range so the heat of the oven can keep my dough warm. This really helps out in winter.) Let rise until double, or about 30 minutes.

Divide your dough into desired number of loaves. Shape each loaf. I roll mine out into a rectangle just about the same width as my loaf pan. Then, I roll it away from me (starting at the short side) as I squeeze it together. Then, I pinch to seal the edges.

Place in lightly greased loaf pans. (You can let it rise again for 30 minutes, or just bake it. I usually just bake it.) Bake at 350° for 30 minutes, or until it sounds hollow when tapped on the bottom.

Wednesday, August 27, 2008

Dinner Rolls

This week I thought I'd post my favorite roll recipe. I got this recipe from my friend, who also, incidentally, showed me how to shape the rolls the easy way. There's no kneading necessary, which makes these super easy. These rolls freeze really well too, so make a batch and freeze some for later!

DINNER ROLLS

2 Tbsp. yeast
1/2 cup warm (105º-115º) water
2 Tbsp. sugar
2 cups hot (120º-130º) water
1/2 cup sugar
1/2 cup butter shortening
2 eggs
2 tsp. salt
7-8 cups flour
butter, melted

Mix together yeast, 1/2 cup warm water, and 2 Tbsp. sugar. Let sit for 10-15 minutes to proof (get all fluffy). Whisk in large mixing bowl 2 cups hot water, 1/2 cup sugar, shortening, eggs, and salt. Add yeast mixture. Add flour one cup at a time. Let dough rise in greased bowl for one hour. Shape; bake at 350º for 16-22 minutes (I baked mine for 18 minutes). Brush with melted butter.

You could let the rolls rise for another hour after you shape them, but I was crunched for time and didn't let them rise again and they turned out just fine. It's just your personal preference.

Okay, here's how I shaped them. I put my left hand into an "OK" shape.
Then, I pinched off enough dough to make about a 1 1/2-inch ball. Instead of rolling the ball, I just put that dough atop the hole I made with my left hand, then pushed it through the hole with the pointer finger of my right hand, while slightly closing the hole. As the dough gets to the end, I pinched it shut and put the seam side down on the greased baking baking sheet. If you look in the top right-hand corner of the picture below, you can see the shaped rolls before they were baked. They look like little white domes. This method of shaping is so easy ... even my four-year-old can do it! (Although, the rolls he makes are quite a bit smaller.)

Tuesday, August 19, 2008

Oven-Baked Caramel French Toast

I don't have a picture for this recipe, but I totally wanted to share it because I like it so much better than regular French toast with maple syrup. I've had this exactly as the recipe is, and then I made it according to my liking. First off ... if you make it exactly like the recipe, it is really yummy; but, it was a little bit soggy for my tastes. I like my French toast to be a little crispy. So, I just make regular french toast (out of the egg mixture of this recipe), then layer it in the 9x13 pan and bake it for about 8-10 minutes with the caramel sauce. But, I'm sure the baking is purely optional if you make it using this method. Anyway, enjoy and let me know what you think!

OVEN-BAKED CARAMEL FRENCH TOAST

1 cup brown sugar
1/2 cup butter
2 Tbsp. light corn syrup
2 Tbsp. heavy whipping cream (optional)
1 cup chopped pecans, divided
12 slices French or Italian-style bread (I like homemade bread)
6 eggs
1 1/2 cups milk
1 tsp. vanilla extract
1 tsp. ground nutmeg
1 1/2 tsp. ground cinnamon
1/4 tsp. salt
Caramel Sauce:
1/2 cup brown sugar
1/4 cup butter
1 Tbsp. light corn syrup
1 Tbsp. heavy whipping cream (optional)

In a small saucepan, combine 1 cup brown sugar, 1/2 cup butter, 2 tablespoons corn syrup, and 2 tablespoons heavy whipping cream. Cook over medium heat, stirring constantly, until thickened. Pour sauce into a 9x13-inch baking dish and sprinkle with 1/2 cup pecans. Place 6 slices of bread on top of the sauce, sprinkle with the remaining pecans and cover with the remaining 6 slices of bread. Combine eggs, milk, vanilla, nutmeg, cinnamon and salt in a blender. Pour egg mixture evenly over bread slices, cover the baking dish, and refrigerate for 8 hours or overnight. The next morning, preheat oven to 350º. Remove the French toast from the refrigerator 30 minutes prior to baking. Bake in preheated oven for 40-45 minutes, until lightly brown. Drizzle sauce over the toast right before serving. To make the Caramel Sauce: In a small saucepan, combine 1/2 cup brown sugar, 1/4 cup butter, 1 tablespoon corn syrup, and 1 tablespoon heavy whipping cream. Cook until thickened, stirring constantly.

Tuesday, August 12, 2008

Grilled Potatoes & Crepes

Okay, so I know those two types of food really don't sound good together ... so thankfully, I didn't make them at the same time! The first thing I want to put on here is some grilled red potatoes.

Before I prepared my potatoes I lined my grill with foil, and then turned it on to heat it to medium-high. First I cut my red potatoes into roughly 1-inch cubes. Then, I put them in a ziploc bag and poured about 1/4 cup of Kraft Sundried Tomato Vinaigrette (YUM!) and shook that around. Once those got coated well enough, and my grill was ready, I poured them onto the foil.
Just a few tips that I discovered while I was grilling the potatoes. DON'T keep opening the grill. I was also grilling some corn, so I was opening the grill around every three minutes or so to turn my corn. But, it took my potatoes much longer to cook because I was letting the heat out every time I opened the lid. DO turn the potatoes occasionally to prevent sticking to the foil, and burning. You want them to look grilled, not charred. There is a chart for grilling vegetables in the summer Kraft Food & Family magazine that says red potatoes cut into 1-inch cubes will only take around 20 minutes to cook. I cooked mine for around 20-30 minutes and they still weren't very tender. Still yummy, though. So, plan on a little extra time if you do potatoes.

(BTW, on this plate I have Country Salisbury Steaks with my potatoes and corn. They were pretty good. Basically like little meatloaf patties (made with stuffing mix instead of bread crumbs), baked then covered with a semi-barbecue sauce.)

Now, onto the crepes. I really wanted to share a recipe with you because I was out last week, and since I didn't really use a recipe for the potatoes, I thought I'd add this one.

Before we left for our trip we had to get rid of some milk and eggs, plus I had some leftover whipped cream from the chocolate pie we ate the week before; so, I made crepes one morning for breakfast. Not the most nutritional breakfast because my children won't eat them with fruit in them, but crepes are super tasty when you add any number of ingredients to their middles. I'm sure you've seen crepes with ham and cheese, turkey, raspberries and cream cheese, etc. Every Friday after Thanksgiving, as early as I can remember, my mom would make crepes and we'd roll up the left-over turkey in them. Sometimes even add the stuffing. Then, we'd pour gravy over the top ... and that was our dinner. (Maybe I'll show you those after Thanksgiving this year.) SO YUMMY! Alas, my husband isn't as thrilled with those crepes; he likes his crepes to be sweet. So, let's get started!
CREPES

1 1/2 cups flour
1 Tbsp. sugar
2 cups milk
1/2 tsp. vanilla
1/2 tsp. baking powder
1/2 tsp. salt
2 Tbsp. butter, melted
2 eggs

Mix flour, sugar, baking powder and salt. Add milk and remaining ingredients. Blend in blender to get smooth texture. Pour scant 1/3-cupfuls into lightly buttered skillet while turning pan to coat bottom. Fill and serve. Filling suggestions: sugar (my children's favorite), berries and fruit, cream, cream cheese, lunch meat, cheese.

My mom had a crepe maker, like this one that she used all the time while I was growing up. It was super easy to use. Basically, you pour the crepe batter into a pie plate (or a dipping dish, like the one that comes with this pan), then turn the crepe maker upside down and dip the top of it into the batter, then turn it right side up and it cooks really quickly -- no turning necessary. This kind of pan yields super thin crepes.

But, if you've ever eaten crepes at a restaurant like "Magic Pan Crepe Stand," or "European Connection," or "Village Inn" you know that the crepes you get there are kind of thick, yet not as thick as pancakes. Those are the kind of crepes that we can make at home with a standard skillet. So, first you pour the batter into the skillet, like so:
And after that, your crepe should look like this:

Now, here's the tricky part. You have to flip the crepe to fully cook the other side. The tricky part about it is making sure you turn it at the right time. I find that when the crepe's edges start to turn away from the sides of the pan that I can slide my spatula around the edges of the crepe, then lift it up and flip it over. This takes getting used to and knowing your pan really well. The first time I made crepes in my stainless steel pan I ruined the first few before I got used to it. (I'd been making them in a non-stick pan before.) So, after you flip the crepe, here's what it will look like:

Then, you turn the side that looks the best down on the plate and put your filling on the less-asthetically-pleasing side. Then, you can roll, or fold the crepe.

**Oh, one more hint: I usually make a double batch because I like to snack on them throughout the day when I make them. But, you can make a double batch and freeze the leftovers for up to three weeks. Just layer a sheet of wax paper (or parchment paper) between each crepe, and then wrap them in wax paper and foil before placing them in the freezer.