
This week I'm posting one of my absolutely favorite dinners. Luckily for me, my sister was here while I made it, so she took pictures for you. (That's why they are so much better than the pictures I take!) She also said that she prefers step-by-step instructional photos, so that's what she took!
Originally I got this recipe from the
Kraft Food & Family magazine a couple of years ago. Since then, I've altered it to my liking. (Actually, the original is much more health conscience: using things that say "reduced-fat," "light," "fat-free," and "reduced sodium." We're all about getting extra fat in our house [and flavor], so I just steer clear of such statements. But, to each their own; make it the way you want to make it!) So, I'll post the original recipe at the bottom in case you want that. Otherwise, this is the way I make it:

Start by heating about
1/3 cup Italian Salad Dressing in a skillet. Use more or less depending on how many chicken breasts you are using. I needed 6, so I used 1/3 cup dressing. Add your thawed chicken breasts to the heated dressing.


While your chicken in browning, start cooking some brown rice. I pour
two cups brown rice into a pot, then fill the pot with water until the rice has about 1 to 1 1/2 inches of water above it. Then, I boil the water down until craters form atop the rice. It usually takes a while to get to this point. So, we'll skip to the next thing I do after I start the rice:

Peel and slice diagonally
5-6 carrots. Again, the number varies according to how much you'll need. In my case, we LOVE these carrots, so I think I used 6.

Then, cut
one onion into wedges. Put both the carrots and onions in a bowl and set them aside to use once the chicken is done browning.

At this point, the chicken has probably been browning for a few minutes. Turn it over. Let the other side cook until it turns a golden brown.

Add carrots and onions.

Pour in
one can chicken broth. (Because I was feeding many people, I actually used 1 1/2 cans chicken broth in my rice instead of water, then I poured the left over 1/2 can of broth in with this one can of broth.)

Cover, and let simmer for 20 minutes; or until carrots are tender.

Check your rice. Do you have craters??? I did. So, I put a cover on my rice and reduced the heat to low. (Ten minutes from this point the rice is ready. This is how I make white rice as well, except the water is only 1-inch above the rice.)

Use this time to cut up
one package of cream cheese into cubes. (Again, I used one and half packages because we LOVE the gravy for this dish, and I wanted to be sure to have enough.)

When your timer goes off, or your carrots are tender, remove everything from the broth. Cover it to keep it warm.

Add the cut-up cream cheese to the broth in the skillet. Whisk it together with the broth on high heat until the cream cheese is blended in. Reduce heat to low and let simmer for 3-5 minutes or until it's thickened a little bit.


Pour cooked rice onto a platter.

Place chicken, carrots and onions atop rice.

Pour gravy over everything.

Take a good look at your very aesthetically pleasing dinner. Then, dig in and revel this yummy goodness.
FARMHOUSE CHICKEN DINNER¼ cup flour
½ tsp. pepper
4 small bone-in chicken breast halves (1 ½ lb.), skin removed; or 4 skinless, boneless breasts
¼ cup light Italian dressing, reduced fat
2 cups Minute Brown Rice, uncooked
2 cups baby carrots
1 medium onion, cut into wedges
1 can (14.5 oz) fat-free reduced sodium chicken broth, divided
4 oz. Neufchatel cheese
Mix flour and pepper in shallow dish. Add chicken; turn to evenly coat both sides. Heat dressing in non-stick skillet and add chicken meat-side down; cook 5-6 minutes or until golden brown. Turn chicken over; add carrots, onions and 1 cup broth. Cover, and reduce heat to medium-low; simmer 20 minutes or until carrots are tender and chicken is cooked through. Meanwhile, prepare rice as directed on package; spoon onto serving platter. Use slotted spoon to remove chicken and veggies from stew; place over rice. Cover to keep warm. Add Neufchatel cheese and remaining broth to skillet; increase heat to high. Cook until cheese is melted and sauce is well blended, stirring constantly. Reduce heat to medium-low; simmer 3-5 minutes or until sauce is slightly thickened, stirring occasionally. Spoon over chicken and veggies; sprinkle with 2 Tbsp. chopped parsley.
 I feel very blessed to be in a school district that fits snack time into the school schedule. The catch is that we have to send our children with their snacks. I always try to have something salty with protein of some form for Una's snack because that combo seems to help her with her hypoglycemia. I would LOVE to send just plain regular chex mix because of the salty nuts and lack of sugar, but she HATES that stuff. In fact, this is the only snack mix I've been able to make (find) that Una will eat and thoroughly enjoy. And, although it is rather sweet, it's not something she'll get everyday. (Thanks, Jessica, for sharing this with me!)
 I don't use the same ingredients; but, I'm sure you can mix it up according to what your family likes best.

 Then add the Kix and Crispix.
 Now add the Kissables and peanuts (which are not shown).
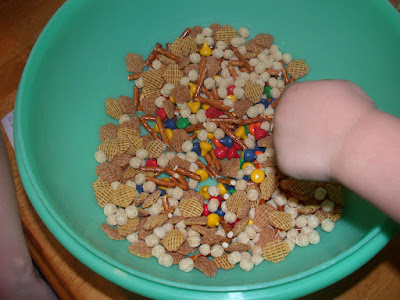
 Pour Vanilla Candy Coating over everything. (My microwave died on me, so I had to use my double boiler.
  Stir everything until it is well coated. Una and Dos were my helpers.
  Dump it all out onto wax paper to cool. Then break it apart and store in ziploc baggies. And, if you're like me, you'll place those baggies in the freezer. That way, when you pull them out they can go into lunch boxes and not get all melted and messy (and neither will the hands that dig into the baggies).

 Una and I had fun using my mini cookie cutters (I originally got these to cut out marzipan shapes for a birthday cake) to make a design in the pie crust instead of just cutting slits.
 I also skipped reading the part about placing the pie dish on a cookie sheet .... big OOPS! This is a must, unless you want to clean your oven at least three times over the next few days. (That's why my cookie sheet looks so clean ... I realized when I started smelling burned filling that I needed the cookie sheet and slid it under the pie a little bit too late.)
 In a large bowl combine all dry ingredients. Warm up your water in the microwave to the right temperature. (I usually test it with my pinky finger. If the water is close to burning my finger, then it’s just about right. Sometimes I check with a thermometer, just to be safe. But, if it feels super-duper hot, don’t pour it into your dry ingredients because you’ll kill the yeast. Also, if you've ever proofed your yeast before, you'll need the water to be hotter than the standard 105°-115° because the yeast is mixed in with the flour already.)