
Today is Table Time Tuesday! I know, I know, I haven’t posted a new recipe is two weeks. That’s why this post is just called: Pasta!
A few years ago, my friend’s husband taught me how to make two different pasta sauces. I’ve already shared one (I call it: Chunky Red Pasta Sauce), and now I’ll share the other one (of course with my modifications), plus one of my own creation.
This first one is an alfredo sauce (or as my family calls it, “white sauce”). If you like alfredo sauce, this is the sauce for you! Well, that is if you want to gain a few pounds. It is rich, creamy, and THE BEST homemade alfredo sauce I’ve ever had, if I do say so myself. We prefer it over the bottled sauces you can buy in the store. And, when I’m in a time crunch, or I just can’t think of anything to make for dinner, I make this and it’s on the table in at least 20 minutes, sometimes sooner.

ALFREDO SAUCE
What you need:
¼ cup butter
1 clove garlic, minced or chopped finely
¼ cup flour
½ tsp. salt
2 cups heavy whipping cream
1/3 cup Parmesan cheese, shredded (fresh is best)
½ tsp. basil
Dash of pepper
¼ cup frozen peas, optional
¼ to ½ cup water from pasta, optional
Pasta (my favorites are linguine, mini penne, or mini farfalle)
How you do it:
Saute garlic in butter in saucepan until butter is melted and garlic is soft. Whisk in flour and salt, and cook until bubbly. Continue stirring the roux for 3-5 minutes. Slowly, pour in whipping cream, stir until thickened, then add Parmesan cheese. When cheese is melted, add basil, pepper and peas. If sauce is too thick, add water from the cooking pasta (be sure to reserve the water if your pasta is finished cooking before your sauce is ready). Serve over pasta.
Tips:
· Always, always, always taste this sauce before you serve it. My measurements aren’t exact because I usually make it according to taste, so you may want more parm or more salt.
· When you cook pasta, do not rinse it off after you have drained it. Rinsing it releases the starches and makes the pasta really sticky. All you need to do is drain it, then pour about 1-2 tsp. of olive oil (depending on how much pasta you cook) over the pasta and toss it. That keeps the pasta from sticking together.
· You can keep this sauce in the fridge for about a week. I haven’t tried freezing it yet; but, I think it will separate even more than it does when it is in the fridge. The trick to avoid major separation is to scrap reheating in the microwave and just heat it up on the stove on a low heat. Slowly reheating the sauce will prevent the fat from separating the sauce. (I do reheat it in the microwave sometimes and it seems to be fine … I think that’s because there is flour in this recipe as opposed to other recipes that just combine butter, cream and Parmesan cheese.)
· If you don’t have, or use, a garlic press (I prefer not to), here’s how to get that pesky peel off the garlic clove (which, btw, is just one little bulb off the head of garlic you’ll end up getting in the produce section at the store): Place the clove on the cutting board on one of its flat sides. Take a wide-bladed knife and place it atop the clove. Hit the knife with the heel of your hand really hard, and push down on the clove. This should smash the clove a little bit … and that separates the peel from the clove. The peel should come right off, then you can chop up the clove (fair warning: garlic is sticky when it’s chopped).
· Try adding chicken, or pork to this … it’s really yummy.
Now, onto sauce number two! This is one that I kind of made up. I’d gone to an Italian restaurant in our little Podunk town and the dinner I got was ravioli in a tomato-cream sauce. If you’ve not had tomato-cream sauce, you are totally missing out! It is so yummy! Anyway, when I asked what the sauce was like before ordering, the waitress told me that it was basically alfredo sauce mixed with marinara. So, I did some experimenting at home and came up with my Tomato-Cream Sauce (or “orange sauce” as my family calls it). My only problem is that I haven’t been able to scale down this recipe. I’ve tried other recipes for tomato-cream sauce, and I keep coming back to this one; so maybe one day I’ll figure out how to make a smaller amount.

TOMATO-CREAM SAUCE
What you need:
1 lb. ground beef
1/2 small onion, chopped; or
½ tsp. onion powder
½ tsp. garlic salt/powder (I use granulated garlic)
1 (12 oz.) can tomato paste
1 can tomato soup
½ can water
½ tsp. oregano, ground
½ tsp. salt
Dash of pepper
½ cup butter
2 garlic cloves, minced or chopped finely
½ cup flour
1 tsp. salt
4 cups heavy whipping cream
¾ cup Parmesan cheese, shredded
1 tsp. dried basil leaves
½ cup water from pasta
How you do it:Brown ground beef and onion until beef is no longer pink and onion is soft. Sprinkle ground beef with garlic salt (and onion powder if you don’t use an onion). Add tomato paste, soup, ½ can water, salt and pepper. Simmer uncovered for 15 minutes, stirring occasionally. Add oregano and simmer 10 more minutes. While sauce simmers, melt butter in separate saucepan. Add garlic and cook for 5 minutes. Whisk in flour and salt and cook until bubbly, stirring constantly. Cook for 3-5 minutes. Pour in cream and whisk together. Stir until thickened. Add cheese and basil. Sauce will be very thick. Add water from cooked pasta. Combine white sauce and red sauce according to taste. Serve over pasta.
 This week's Table Time Tuesday is a recipe I tried back in July when I got my Kraft Food & Family magazine. I used leftover grilled chicken for my filling. We also put sour cream atop our enchiladas and I really liked it that way. Anyway, here's the recipe:

 And, here’s how much fudge sauce you’ll get in the end! Please excuse the attractive vacuumer in the background … our floor was pretty crumbly. (Side note: isn’t it awesome that my hubby will vacuum for me so I can have fun cooking things like fudge sauce without having to walk all over the crumbs on the floor?)
 WHITE CHILI
  I’ve combined my steps. The following are in the pot: chicken, onion, Velveeta, Monterey Jack cheese, and frozen corn.
 Now I’ve added: 1 can petite diced tomatoes, 1 can diced green chilies (this is how I control the spiciness), 2 cans great northern beans, and 2 cans cream of chicken soup.
  Then, I poured in the chicken broth and stirred it together.
 I let it simmer for a few hours, then I couldn’t wait for the trick-or-treaters to come home before I dug in. My favorite chips with this are the scoop-like tortilla chips. My friend, who gave me the recipe, served this with Fritos.

 Fold over the parchment paper, hand the meat tenderizer mallet to your 8yo and let her go at it! Or, if you prefer (or don't have an 8yo to do it for you), start pounding away. Make sure you tenderize the thickest part of the chicken the most, and don't hit it too much in the super thin areas because you'll break apart the meat.
 Once you've tenderized all your chicken breasts, place a thin slice of ham in the middle of each chicken breast.
 Here's a trick to really good coating. Beat one egg in a bowl. Add 1/2 cup evaporated milk, and mix together really well. Set it aside. This mixture helps the crumbs to stick to the chicken better than just milk, melted butter, or a beaten egg.
 Pour some cornflake crumbs in a dish. You can use bread crumbs if you prefer. I like the crunchiness of the cornflake crumbs. I used to find a box of cornflake crumbs at the grocery store when we lived in Utah, so for the last five years I've been crushing my own crumbs (which is fine, except the flakes are either not finely crushed enough, or they are too powdery). However, the last time I was at the store, I saw a box of cornflake crumbs in the baking aisle ... if you can't find them, be sure to check the bottom shelf (seems like all the goodies are down there).
 Take your rolled up chicken and dip it into the egg-milk mixture.
 Roll the chicken in the cornflake crumbs. This can get a little messy. I usually use my right hand for the dipping, and my left hand for the rolling. And, after I place the chicken in the pie dish (with my right hand), I roll it slightly on its side, then take a spoon (in my left hand) and scoop some crumbs on the top of the chicken, then I roll it with my left hand and pick it up to press the ends in the crumbs.
 Place the chicken in a 9x13 baking dish and bake at 350° for 45 minutes, or until chicken is thoroughly cooked.
 I like to serve my chicken cordon bleu with rice and a gravy. The gravy is so basic and yummy: one can cream of chicken soup, and one (8 oz.) package of cream cheese. Heat it up and pour it over the chicken and rice.

 CHOCOLATE CHIP PUMPKIN BREAD


 I don't use the same ingredients; but, I'm sure you can mix it up according to what your family likes best.

 Then add the Kix and Crispix.
 Now add the Kissables and peanuts (which are not shown).
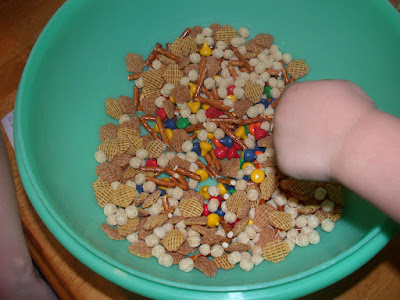
 Pour Vanilla Candy Coating over everything. (My microwave died on me, so I had to use my double boiler.
  Stir everything until it is well coated. Una and Dos were my helpers.
  Dump it all out onto wax paper to cool. Then break it apart and store in ziploc baggies. And, if you're like me, you'll place those baggies in the freezer. That way, when you pull them out they can go into lunch boxes and not get all melted and messy (and neither will the hands that dig into the baggies).

 Una and I had fun using my mini cookie cutters (I originally got these to cut out marzipan shapes for a birthday cake) to make a design in the pie crust instead of just cutting slits.
 I also skipped reading the part about placing the pie dish on a cookie sheet .... big OOPS! This is a must, unless you want to clean your oven at least three times over the next few days. (That's why my cookie sheet looks so clean ... I realized when I started smelling burned filling that I needed the cookie sheet and slid it under the pie a little bit too late.)
 This week I'm posting one of my absolutely favorite dinners. Luckily for me, my sister was here while I made it, so she took pictures for you. (That's why they are so much better than the pictures I take!) She also said that she prefers step-by-step instructional photos, so that's what she took!
 Start by heating about 1/3 cup Italian Salad Dressing in a skillet. Use more or less depending on how many chicken breasts you are using. I needed 6, so I used 1/3 cup dressing. Add your thawed chicken breasts to the heated dressing.
 While your chicken in browning, start cooking some brown rice. I pour two cups brown rice into a pot, then fill the pot with water until the rice has about 1 to 1 1/2 inches of water above it. Then, I boil the water down until craters form atop the rice. It usually takes a while to get to this point. So, we'll skip to the next thing I do after I start the rice:
 Peel and slice diagonally 5-6 carrots. Again, the number varies according to how much you'll need. In my case, we LOVE these carrots, so I think I used 6.
 Then, cut one onion into wedges. Put both the carrots and onions in a bowl and set them aside to use once the chicken is done browning.
 At this point, the chicken has probably been browning for a few minutes. Turn it over. Let the other side cook until it turns a golden brown.
 Add carrots and onions.
 Pour in one can chicken broth. (Because I was feeding many people, I actually used 1 1/2 cans chicken broth in my rice instead of water, then I poured the left over 1/2 can of broth in with this one can of broth.)
 Cover, and let simmer for 20 minutes; or until carrots are tender.
 Check your rice. Do you have craters??? I did. So, I put a cover on my rice and reduced the heat to low. (Ten minutes from this point the rice is ready. This is how I make white rice as well, except the water is only 1-inch above the rice.)
 Use this time to cut up one package of cream cheese into cubes. (Again, I used one and half packages because we LOVE the gravy for this dish, and I wanted to be sure to have enough.)
 When your timer goes off, or your carrots are tender, remove everything from the broth. Cover it to keep it warm.
 Add the cut-up cream cheese to the broth in the skillet. Whisk it together with the broth on high heat until the cream cheese is blended in. Reduce heat to low and let simmer for 3-5 minutes or until it's thickened a little bit.
 Pour cooked rice onto a platter.
 Place chicken, carrots and onions atop rice.
 Pour gravy over everything.
 Take a good look at your very aesthetically pleasing dinner. Then, dig in and revel this yummy goodness.